This article records how to use Surge to turn your Mac into a relay station for other devices in your home to access the internet scientifically.
Background#
This year, during the 618 shopping festival, I got my first handheld gaming console, the Nintendo Switch OLED version (Japanese version). Switch games can be downloaded from the eShop, but accessing and downloading games from the eShop directly in China is extremely slow. I learned that the eShop on the Switch requires a game accelerator to function properly, similar to Steam. However, the UU accelerator requires an annual fee of 283 RMB, which I was reluctant to pay (yes, I'm the type of person who doesn't blink when buying expensive items but is very calculative when it comes to cheap accessories 🙄).
I remembered seeing others use Surge to proxy and forward on their Mac so that the Apple TV could access the internet smoothly (scientifically), so I searched online for tutorials, and indeed it was possible. Thus, this tutorial was created as a record for future reference.
Preliminary Environment Setup#
- Surge for Mac (using the Mac as an intermediary to proxy and forward for other devices)
- Mac Studio (connected via Ethernet; after configuration, it cannot be turned off. I found that if the Mac goes to sleep, the Surge software will automatically exit, so the computer needs to stay awake. If it goes to sleep, it needs to be restarted to continue using it.)
- M1 Max
- RAM: 64 G
- System: macOS Monterey 12.4

- Airport subscription address (if you don't have one, you need to find one yourself 😂, essential for scientific internet access)
The following tutorial assumes that the above 3 conditions are already met
Surge#
Introduction to Surge#
Overview#
Surge is a network development and proxy tool. It is designed for developers, so a certain level of expertise is required to use it.

The following four are the core workflows of Surge.
- Interception: Intercept network connections initiated by devices. Surge supports two interception modes: proxy server and virtual network card.
- Processing: Modify intercepted network requests and responses. This includes URL redirection, local file mapping, and custom modifications using JavaScript, among other methods.
- Forwarding: Forward intercepted network requests to other proxy servers. This can be global forwarding or determined by a flexible rule system for outbound policies.
- Interception: Intercept and save data from network requests and responses, and decrypt HTTPS traffic through MITM.
We mainly use forwarding here.
Features#
I was mainly attracted to Surge because of its several features:
- High performance, stability, and efficiency: Surge can easily handle network data while consuming very little resources and maintaining high stability, especially when paired with the M1 chip for better energy efficiency and stability.
- Enhanced mode: Surge sets up a virtual network to intercept all network requests, especially those from software that does not support web proxies well.
- Gateway mode: Surge for Mac can act as a three-layer gateway to handle network requests from other devices on the same network. (In simple terms, it can act as a router, becoming the hub of your home network.)
Downloading and Purchasing Surge#
You can download Surge for Mac directly from the Surge official website. The version I downloaded is the latest, Surge 4.6.1 (1718). After downloading, it is a compressed file; unzip it and drag the app into the Applications folder to open and use it.

However, after downloading, you cannot directly access the internet scientifically; you still need to pay for a license. Go to the official website to purchase a license: 49.99 USD for 1 device, 69.99 USD for 3 devices, and 99.99 USD for 5 devices, supports Alipay payment. I bought the 3-device license (I wanted to set one up at home for the New Year, so I bought 3), costing me 471.13 RMB (due to fluctuations in the exchange rate, it hurt my wallet). You can purchase according to your needs, with at least one device required.
After purchasing, you can activate Surge using the email address you used for the purchase and the activation code sent to your email after the purchase.
Let Surge Take Over Mac's Network#
Next, you can let Surge take over the network of your Mac (allowing the Mac to access the internet scientifically). At this point, you will need your airport subscription address.
Adding Configuration Files to Surge
Here, we will use the URL to install the configuration file. You can also import via file or add configurations manually.
If your airport subscription directly provides a Surge subscription address, you can add it directly. If not, but you have v2ray, ss, or trojan subscriptions, you can generate a URL that Surge can recognize through third-party subscription conversion.

- Select basic mode; if you want to customize specific nodes, you can choose advanced mode.
- Paste your airport subscription address into the subscription link.
- In the client dropdown, select Surge4.
- Click the red button to generate the subscription link, and click copy.
Open the main interface of Surge, click more in the lower left corner, and select Configuration in the settings.

Select Install Configuration File from URL.

Paste the configuration file subscription address generated by the third party, then select finish, and wait for Surge to import the rule policies.

Once Surge finishes recognizing, a new hosted configuration will appear. Select this new configuration and click Apply in the lower right corner.

Return to the main interface of Surge, select the strategy under proxy, and choose Rule Determination. At this point, check if scientific internet access is successful. If not, click the Surge tab and check if Set as System Proxy and Enhanced Mode are checked. If not, check them and restart Surge.

At this point, your Mac can happily access the internet!
Making Mac the Hub of Your Home Network#
The above steps have allowed the Mac to access the internet happily, but it’s better to share the joy. How can we let other devices at home access the internet happily as well?
This is where Surge's DHCP server function comes into play, which is the gateway mode introduced above.
Setting the Computer's IP to Static IP#
- Open System Preferences - Network, and select Ethernet (the wired interface).
- For IPv4 configuration, select Using DHCP (Manually Set Address).
- My router is 192.168.1.1, so I set the IP address to 192.168.1.2; just change the last digit to be between 2-225. (If your router is 192.168.0.1, you can set your IP address to 192.168.0.2, and so on.)
- Then select Apply.
Note: Before setting this, make sure to turn off Surge's system proxy setting, as it will affect the subsequent IP address configuration. It is recommended to turn it off first and then turn it back on after completing the settings.

Turning Off Router DHCP#
Log into your home router's management backend, find the DHCP server settings on the management page, and turn off the router's DHCP (most routers will have this option).

Opening Surge DHCP Options#
In Surge, on the left side under Devices, click to open and find the DHCP Server switch at the bottom. Turn it on and select the next step.


Select Ethernet for the wired connection, and click next.

Surge will check the current network environment for DHCP settings. If you correctly turned off the router's DHCP, it should generate the configuration directly here.

Select Surge's default settings and click Finish. If you find that the router address is empty here (I got stuck here for a while at first, later realizing I selected the wrong network device, choosing Ethernet Adapter (en6)), you need to check where the steps went wrong.


After starting the DHCP server, you may see that the device list shows no devices. At this point, you need to restart the router or have the devices you want to use reconnect to the Wi-Fi, and you will see them in the new devices list.

Adding Device Members#
For devices that want to access the internet scientifically, you can right-click the device name and select Use Surge as Gateway, then have the device reconnect to Wi-Fi or turn off the router's Wi-Fi and turn it back on.
If it doesn't connect, it will show waiting for connection. It is recommended to also check Set Fixed IP Address, which is the recommended practice on the official website for easier future device management and connections.


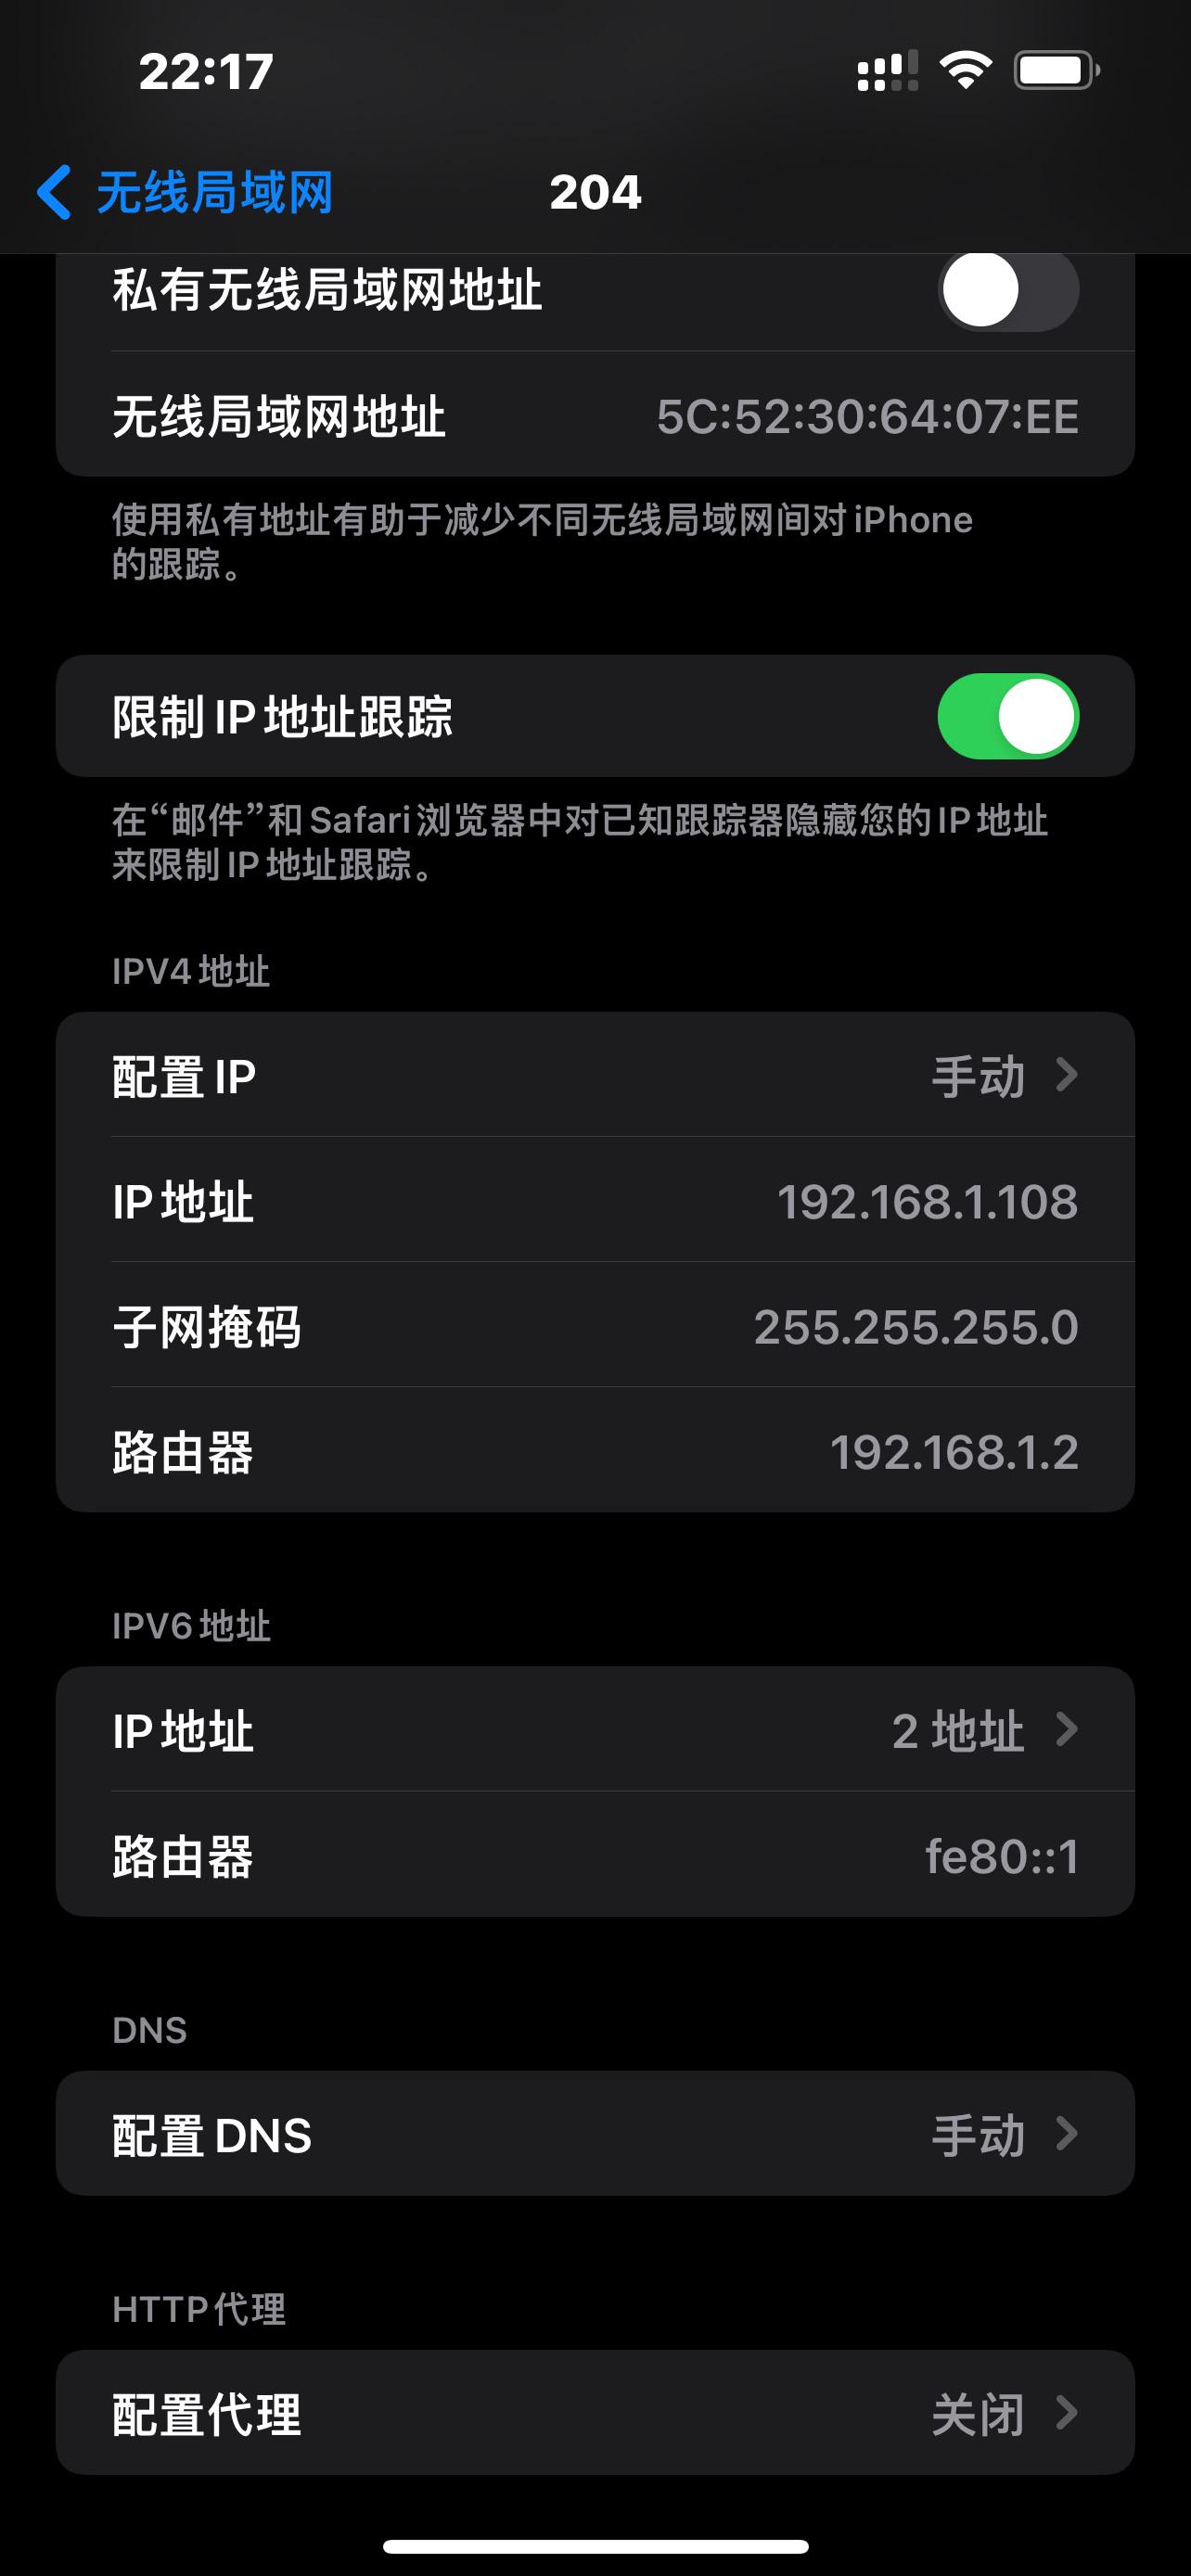
For Apple phones and tablets, due to privacy concerns, they will default to using a private Wi-Fi address when connecting to Wi-Fi (using a private address helps reduce tracking of the iPhone across different Wi-Fi networks). You need to turn off this option and reconnect to Wi-Fi for Surge to recognize your device.


If you are unsure which IP address corresponds to which device, you can check the router management backend or infer based on the manufacturer of the IP.
Finally, it is recommended to change the IPV4 address of the device connected to Wi-Fi to manual, because if you enable automatic DHCP, the IP address may change the next time you connect to this Wi-Fi. If the connection fails, you can change the IPV4 address to manual according to the following configuration.
At this point, all devices in your home that want to access the internet scientifically can happily play together through the Mac computer as a network hub!
Special Cases#
Initially, when I was using it, I encountered a situation where the Mac using Surge as a gateway could open YouTube videos on the web and watch them, but other devices at home connected via Wi-Fi could not access Google. I checked and found that I could open the YouTube app, but could only see the video thumbnails. When I clicked to open the video to watch, it remained in a loading state and could not be viewed. Strangely, I could open Netflix and watch shows normally.
The solution I found for this situation was to modify the DNS configuration of the Wi-Fi connection on the device needing to access YouTube from automatic to manual, and add a DNS server 192.0.2.2.


As for why this DNS address was set, I am not very clear, just know that it was written in the manual 🐶, and this resolved the issue of YouTube being inaccessible!
Conclusion#
In the future, if there are other devices that want to access the internet happily, they can use this Mac computer enchanted by Surge as a forwarding proxy, saving on the annual fee for an accelerator, and it works better with a wider coverage. However, the Mac computer needs to be kept on; otherwise, other devices in the home will not be able to access the internet.
This article only briefly used the basic functions of Surge (the access rules were not customized), and there are many customizations that can be made to Surge. These deeper features will be explored gradually in the future. For now, I’ll happily play with my newly arrived Switch. If you have any fun games to recommend, feel free to share!